The fishing industry in England used to be much larger than it is now. For the South Coast tourism took over, and once a railway line was laid to Newhaven it became a major ferry port to Dieppe and Calais. However, where there's sea, there's fishing, and the fishing fleet of Newhaven supply to my local fishmonger. It makes sense to me that if you want the freshest fish going you need to head to the source.

West Quay Fisheries is where it's at. I'm telling you now that this is the freshest trading point for Newhaven fish with the widest selection, at least that I know of.

It's hard to know where to start. This is a temple go Channel Island fish right here.

I settled for a mackerel, some skate and some scallops. The fish is top quality, the eyes are black and clear, there's no smell of fish and some mackerel are still stiff fresh.

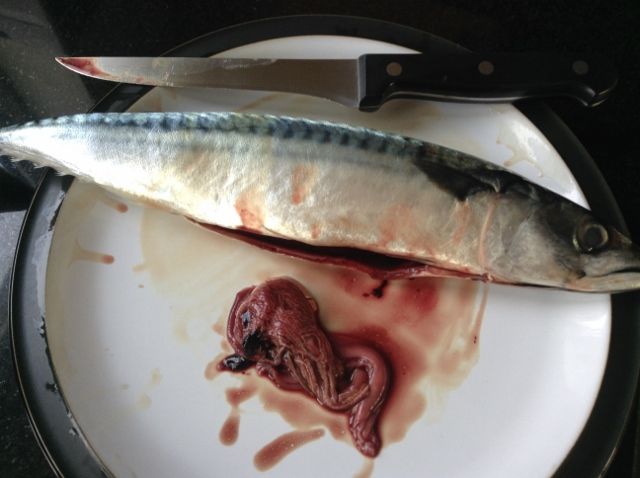
I started with the mackerel, this is my favourite fish from the British Isles. Just look at this beautiful fish.

So to gut it take a sharp filleting knife and slice from under the head back to the anus. Make a shallow cut and try not to damage the organs. Once you have it opened up slice off the intestinal tract at its end and cut away the rest at the head end. Be gentle so you don't actually burst anything inside the fish. Fish guts make good compost, that's where these have gone.
Now slice down the back, cutting just to the left of the spine and make a cut as close as you can to the head to remove the fillet.

Cut off the head and the tail and you will be able to lift out the spine along with most of the other bones.
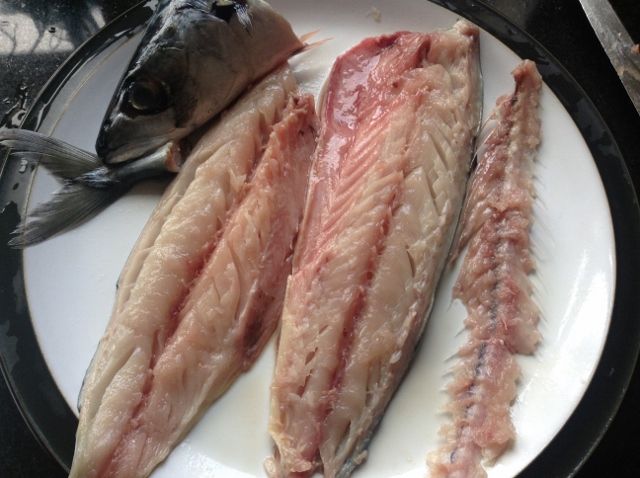
Now grab a pair of tweezers and pin bone the fillets. Once that's done all that remains is to neatly trim the fillets.
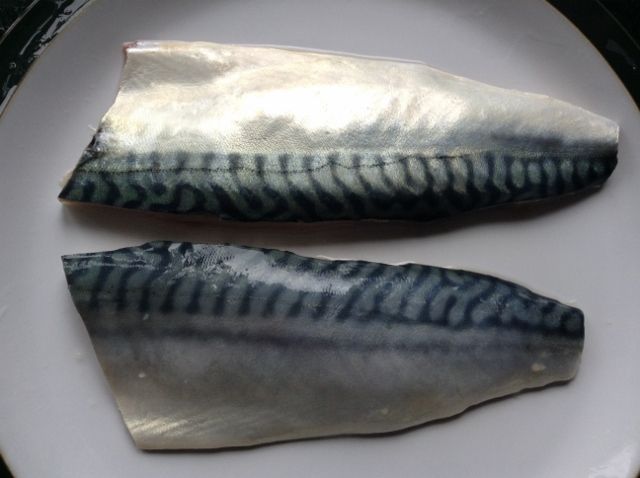
Sorry, I would have done a lovely complex recipe for these but they were so fresh and so good I really couldn't wait. I simply fried them in butter and ate them straight away.

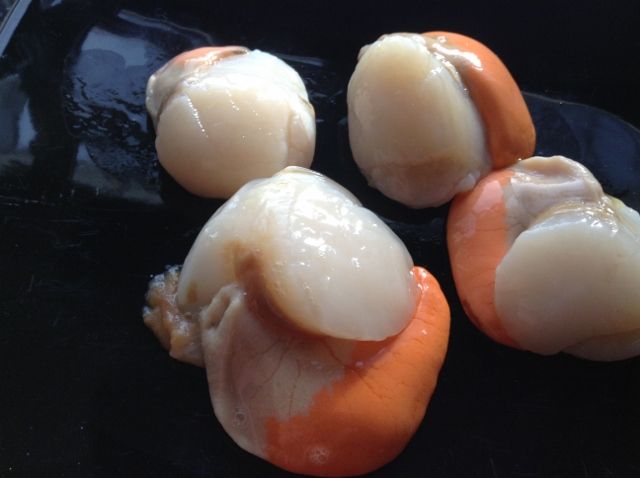
Now it's the scallops turn. Just down the coast at rye you get some of the best scallops in England. Do them a favour, leave the roe on, it's just as tasty as the rest of the scallop.
I'm cooking mine in the pan and I need...
Scallops
1/2 clove garlic
2 knobs of butter
50ml sherry
150ml double cream
1 rasher pancetta or bacon

Mince the garlic and fry in half the butter. Then add the scallops and fry until they're firm when you gently squeeze them.

Remove the scallops from the pan and add the sherry. Stand back as it's going to catch fire! Once the sherry has burnt all its booze off throw in the rest of the butter and stir with a whisk until shiny and smooth. The butter you fried the scallops in should have burned slightly and given it a deep brown colour.
Now add the cream bit by bit, whisking in fast as you go. Whisk until smooth and bring the whole lot up to temperature so it's gently simmering. Something that goes stupidly well with scallops is bacon, it's a match made in heaven, you'd think pigs were aquatic. So grill a rasher of pancetta until crispy to put on top. Plate the scallops, the sauce and finish with the bacon. Amazing.

Last up is the skate.

To prepare the skate you need your knife and a pair of pliers (it's fine if you ask your fishmonger to to this bit, it's hassle). Make a small slit under the skin at the body end of the wing and use the pliers to rip the skin off.

Turn over and do the other side.

Now to cook it I suggest the classic way is the best. That is you slowly poach it in court bouillon. To make the court bouillon use 1.5 litres of water, 100 ml of lemon juice (about 1 lemon), a carrot, half an onion, 1/2 tsp parsley, 1/2 tsp thyme, 1/2 tsp salt, 1 clove and a bay leaf. Bring that to the boil then turn down and put in the skate.

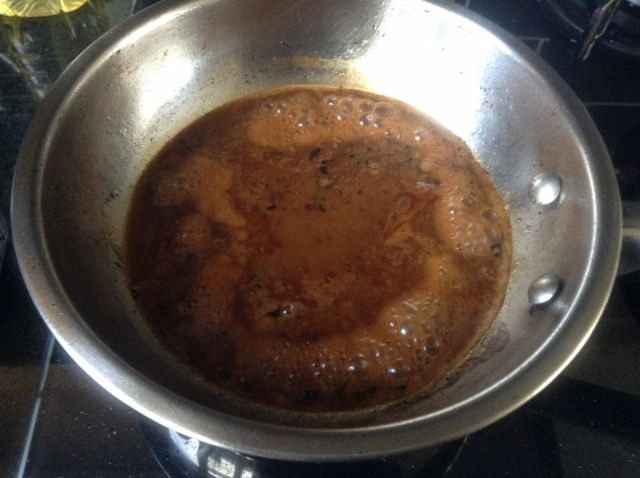
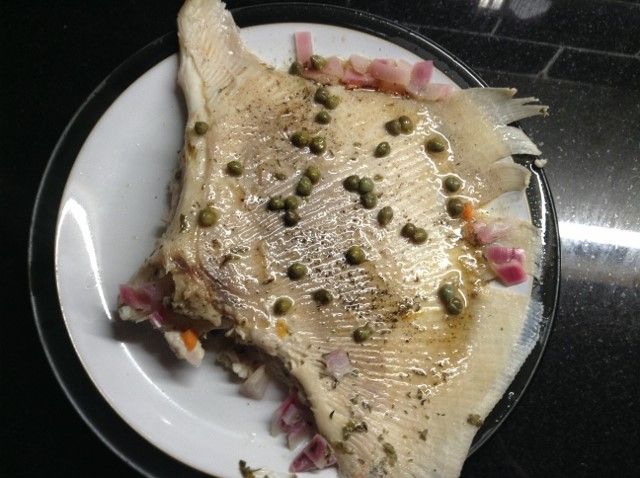
When it's done it flakes away beautifully. Gently lift it out the pan and onto a hot plate. Finish with a beurre noisette (that is butter thats been burnt on the stove until it turns a nut brown colour) and some capers.
Obviously the best way to ensure you've got the freshesh fish available is to catch it yourself, and living by the sea thats something I can do, but I'll be leaving it till a little later in the year when the weather improves and the season starts. In the meantime I'm happy to leave it to the pros in Newhaven.
This is the easiest wine in the world, really tasty too so it’s a good one to have in your repertoire. Usually I like to forage for ingredients for wine as that makes it more free, and therefore better, however at this time of the year ingredients are a bit thin on the ground and frankly it’s too muddy and cold for me to be bothered to get them, so I cheat. This wine uses just bog standard cranberry juice from concentrate from the supermarket, 4 litres of the stuff.

You will need…
Steriliser
1.3kg sugar
3-4 l juice
1 sachet or a heaped teaspoon of dried wine yeast.
1 sterile glass
Cling film
1 campden tablet
A demijohn
A funnel
An airlock and bung
A large spoon for stirring
A large sterilised saucepan
A solid bung
Sterilise everything before you start. Weigh out the sugar in the saucepan. I know what you're thinking, that's an absolute bum load of sugar. It is, but hopefully most of it's going to become alcohol soon.

Add 1 litre of cranberry juice and stir over the hob until all the sugar is dissolved into the juice. It'll be a translucent syrup when done. Don't let it get too hot, cool it a bit before using too.

Pour 1 litre of cranberry juice into the demijohn, then add the syrup, then another litre of juice. You won't fit another whole 4th litre in, just fill up to the shoulders of the demijohn.

Crush and add the campden tablet. Now fit the solid bung and give the demijohn a really good shake. Pour out a little of the juice into a thoroughly sterilised glass and add the yeast. Cover the glass with cling film and leave it for the yeast to re-hydrate and activate. After a while the cling film should start bulging and there will be bubbles on the surface of the liquid in the glass.

When the yeast is ready pour the contents of the glass into the demijohn and fit the airlock. Move the demijohn to a nice dark warm place and let the yeast do its thing. Done! I’ll fill you in on the next part in a few weeks.

As I mentioned, it’s too cold to go out foraging, but that doesn’t mean I can’t use ingredients I foraged last year and have been keeping frozen! These sloes and damsons I picked in about October/November time and they’re good for making a 2 plum wine. I picked and froze nearly 2KGs of them.

Firstly defrost them in a sterile food grade bucket (or big saucepan if you don’t have one) and when they are defrosted put the lid on and rattle them around to severely bruise them. Now pour in 1 gallon of boiling water, either from the kettle, or as I like to do it on the stove so I can add it all in one batch.

Leave this for 4 days, stirring or moving around twice a day. When you are done you will have a “must” that is the extracted concentrate of the fruit. Strain this through muslin to get out all the little bits of fruit and dead insects etc, then pour about a litre of it into a saucepan. Add the sugar as you did with the cranberry wine.

Pour it back in the demijohn, make sure it’s not warm to the touch and add the yeast and campden tablet as described in the cranberry wine.

Swirl it around, fit an airlock, and yer done. There’s another couple of gallons of wine that’ll be ready to enjoy at the beginning of next year (I’ve got last year’s to keep me going until then).
Walking is something that's always been part of my life, and even though my blog is predominantly a foodie one it's nice to write about some of the places too. I think the very best way to appreciate the country for all its beauty is to walk it. This walk is fairly ambitious, but the are ways to make it easier. Firstly you could do it in Summer and not In the Winter after heavy rain (the fields at the foot of Ditchling Beacon were like rice paddies), and second you could just catch a bus to the top of the Beacon and start from there, cutting out the worst of the climbing. I'm not particularly good at measuring walks in distance but you should leave at least 4 hours for this one, I'd say it's about 12 miles.

This walk starts in the old village of Ditchling, north of the South Downs. Getting there might be easier by bus but you could do the 25 minute walk from Hassocks station.


It's a pretty place, that like many villages in England has been sat at the foot of the downs since Saxon times.

Walk south from Ditchling high street, here's the clue, that's the direction that all the big hills are in. You need to find a small path that's takes you to Ditchling Beacon. It's hard to find, but my recommendation is look for the road sign to the beacon and its behind that.


The path takes you behind lots of houses and gardens, at one point you'll come out into a residential area and need to pick it u again yo your right (literally follow the sign here). At the end of the path you climb over a style and you're in a field.


Here you just follow the brown patch, it's an obviously well trodden track and you just head along it. Don't be tempted to stray off to the left, keep aiming for the big hills and after about 4 fields you reach a small road. Head left along the road and you'll find yourself at a small car park at the foot of Ditchling Beacon. This sign is opposite.


Walk up the path from the car park that takes you up the beacon. It's a hard slog, but mercifully it's through forest and the tree roots act as steps as you climb. At the top of this path you'll reach a gate. Take the left hand path here.
As you continue to climb you'll start appreciating how high you actually are.

Finally at the top you'll get to enjoy the view from the highest point in Sussex. Welcome to Ditchling Beacon. You've done the hardest part of the walk, now you can enjoy a bit of the Sussex countryside and see a few of the farms that produce the food we cook with.

If you keep bearing left and climbing you'll eventually hit the car park at the top of the Beacon, if you're lucky the ice cream van will be there! At the entrance to the car park you'll pick up the South Downs Way, and that's where you're headed for a bit now.


The South Downs Way stretches from Eastbourne to Winchester, and that walk itself is immense and highly recommended. It's 100 miles though, when I do it I tend to stay in a few of the many B&Bs on the way. I love it, it's an ancient path trodden by generations of Romans, Saxons and Normans before you. It's also very useful as a walkers superhighway on top of the downs.

After a while walking on the SDW you have passed Plumpton College down on you left and you'll be level with Plumpton.


Here's where you're going to take a shortcut. The fence on you right stops at a corner and there's another track leads off from the SDW heading south, take that path. A little way along it starts to go down hill, but before you get to there there's a gate where you can get onto the other side of the fence to your right. As you walk along you'll see the Amex stadium in Falmer in the distance and a V shaped patch of forest which is what you are aiming for.

Keep walking down the hill, it gets steeper and steeper until at the bottom the path starts to head right and you find yourself walking up the other side of the valley. At the top of the path on the other side there is a gate with a sign post next to it.

You are heading in the opposite direction to the signs, right as you've come through the gate. You're on your way to getting off the downs and onto road again. After a bit of walking along this track you'll hit road, head left down the road to take you all the way into Falmer. Look for the Swan pub on Middle Street.


Opposite the pub is a bridge taking you over the A27 to the other side of Falmer. Falmer is one beautiful village but sadly the A27, which was built over an ancient road that historically linked Brighton to Lewes, cuts it in half.

On the other side you'll find the duck pond from which Falmer draws its same ("fallow" is old English for a pale coloured pond).

If you head round past the church and the graveyard you'll find the Falmer to Woodingdean link path. This track takes you neatly up to the top of Woodingdean and you'll now be leaving the AmEx behind you.


At the top of the path I would advise not going down the hill into Woodingdean, you'll only have to walk back up the other side of the high street. Instead cross straight over the road (being careful!) and take the tarmac path that leads you behind Woodingdean. At the end of that path you are on Warren Road.
Now I've gotten you this far, the last part is up to you...

Option A: If you go left, back in the direction of Woodingdean you'll see a car park on the other side of the road. If you take the track through the car park it will take you down the hill to Ovingdean, past a 13th Century church, past the 1930s Ian Frasier House of Blind Veterans UK and under a tunnel to Ovingdean beach where you'll find a cafe. From here you can walk West to Brighton Marina and to shops restaurants and pubs.
Option B: You go right on Warren Road, away from Woodingdean and eventually that will turn into Elm Grove which will take you steeply down to the level in central Brighton.
For me, it's usually option B as that leads to the nearest decent pub and a well deserved rest.

All satellite images courtesy of Google Maps

